Previous Trunk Project Links:
73 Mach1 Tail Panel - Before , 73 Mach1 Tail Panel - During , 73 Mach1 Trunk Repair
73 Mach1 Tail Panel - Continued:
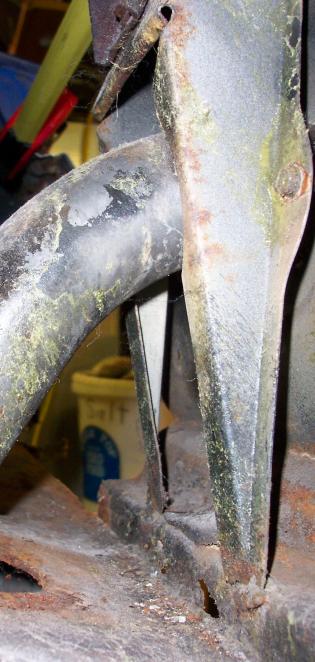
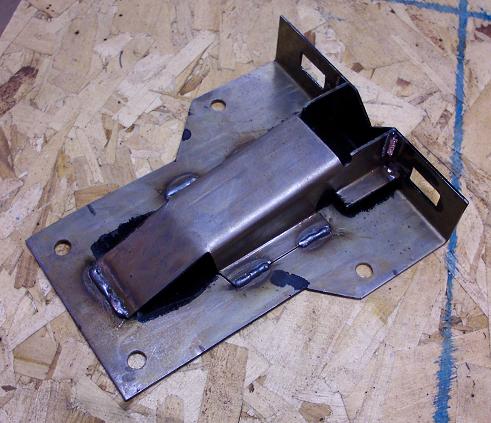
I restored the trunk latch support bracket
with the POR-15 process.
The lower 3" of legs had been welded off
by some past repair by a previous owner.
I cut off the rusted parts and welded
leg extensions on.
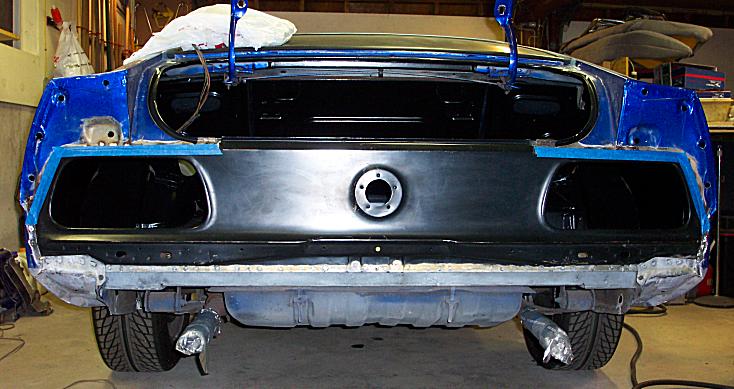
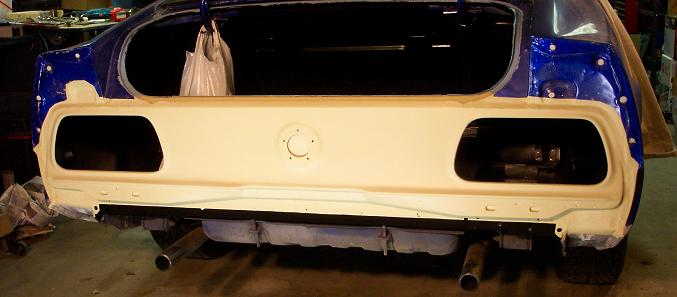
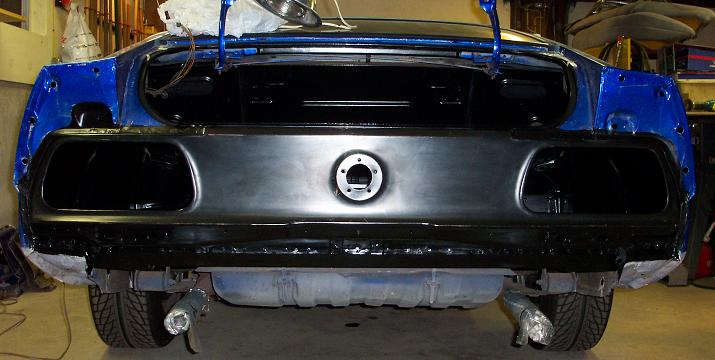
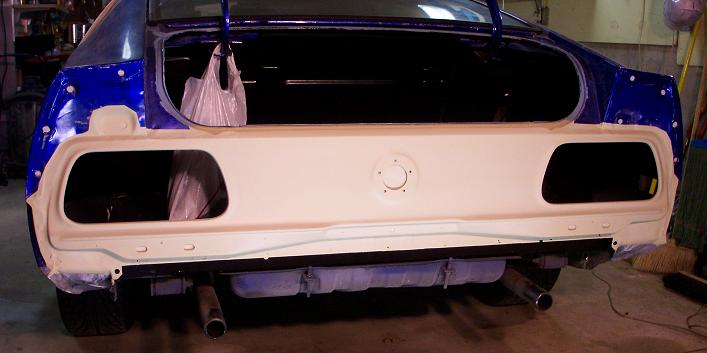
In the interest of expediting this project (plus the difficulty of taking pictures of black objects) I don't have as many pictures of this process as I would have liked. Tail panel preparation involved wire brushing the primer off the lips that were to be welded, and drilling 7/32 dia. holes every 2" on the bottom lip. Again, in the interest of time, I did not use weldable spray primer on the seams. Instead, I forced POR-15 into the seams and let gravity wick it down. The blue tape above is to prevent the POR-15 from running out of the seams. A lot of time and lots of clamps were devoted to panel alignment. Though the NOS panel fit like a glove, I did some tweaking via minor panel trimming to get it perfectly centered. I had noticed that the tail lights were slightly off center on the old panel. Nothing that anyone else would notice, but it bugged me.
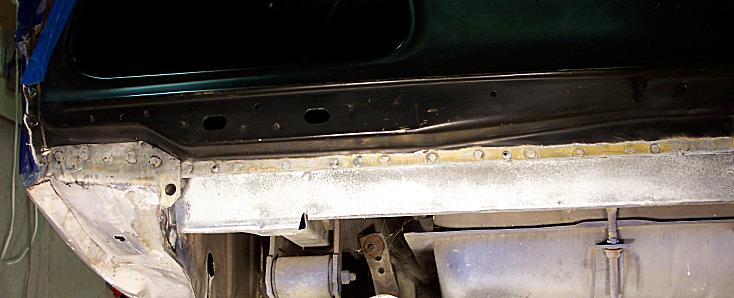
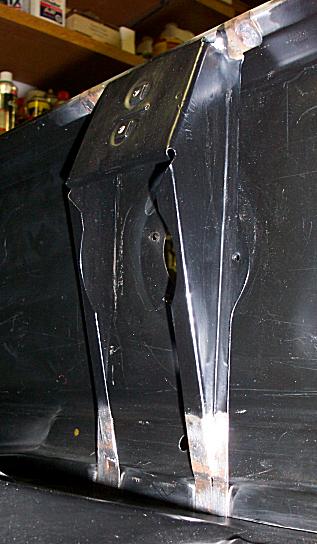
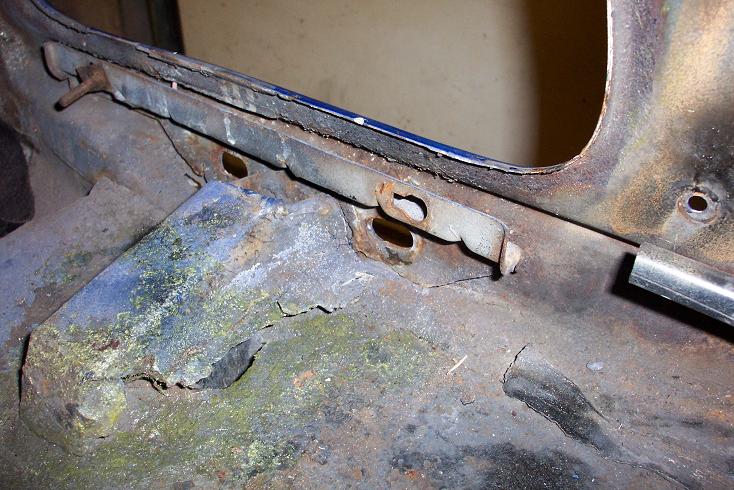
All the welds were ground down and etched.
I applied POR-15 to all exterior welded lips.
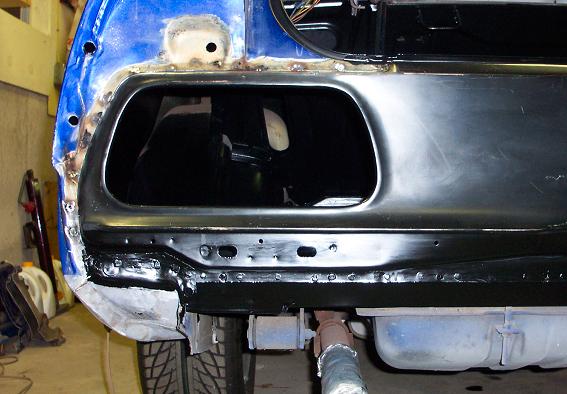
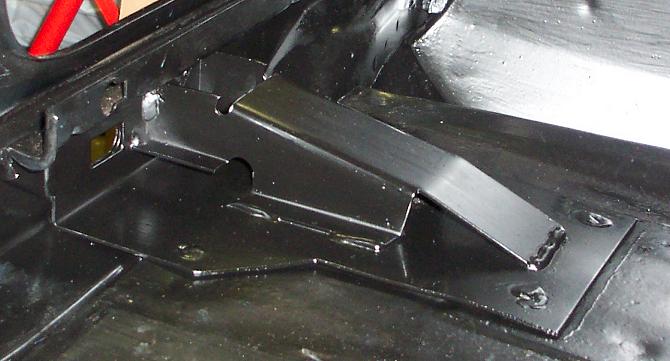
Since the original trunk mounted bumper support brackets were kind of nasty, I purchased replacement brackets from Virginia Mustang (central welded piece in above picture). They weren't exactly the same but worked after some minor grinding. Since I've always felt the bumper support area on 71-73 Mustangs is too weak, I decided to make 14Ga. support brackets (large "L" formed bottom bracket with holes in above picture). Before welding, all parts were washed, etched, and finished with POR-15 on the areas that would be unreachable after welding. Lesson learned during this process: Dried POR-15 maintains a flame very nicely once it gets lit, which it does quite easily when welding.
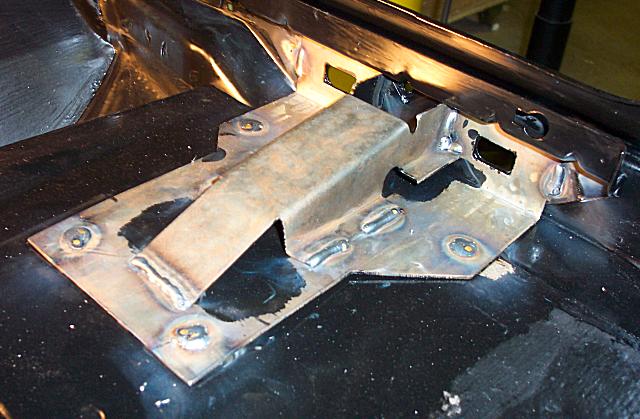
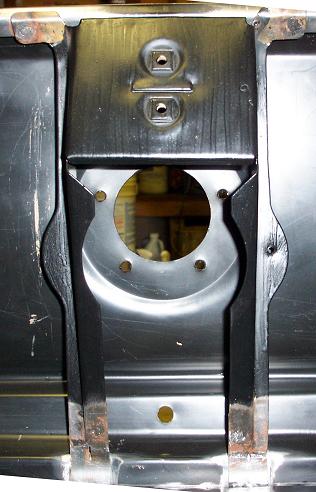
Both the trunk floor and the underside of the bracket were finished in POR-15 prior to welding except for a small area around each weld sight.
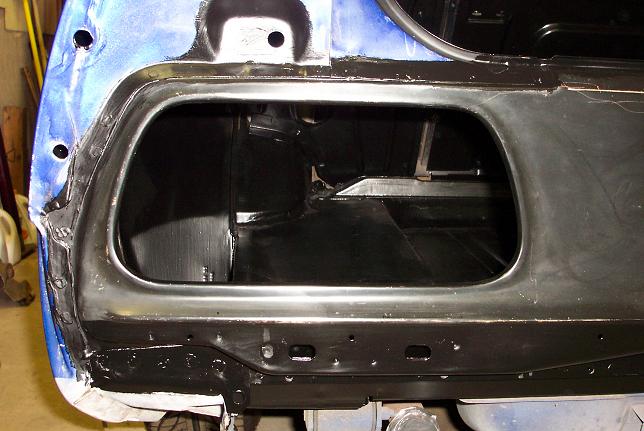
I filled all the exterior seams with POR epoxy putty and sanded it smooth. I also used POR-15s Tie-Coat Primer over the areas that had been treated with POR-15 and epoxy putty. Unfortunately the Tie-Coat Primer that was painted over the epoxy putty blistered when regular spray primer was applied. Quite a bit of time was spent removing the Tie-Coat Primer from those areas. I won't be using Tie-Coat Primer on anything in the future.